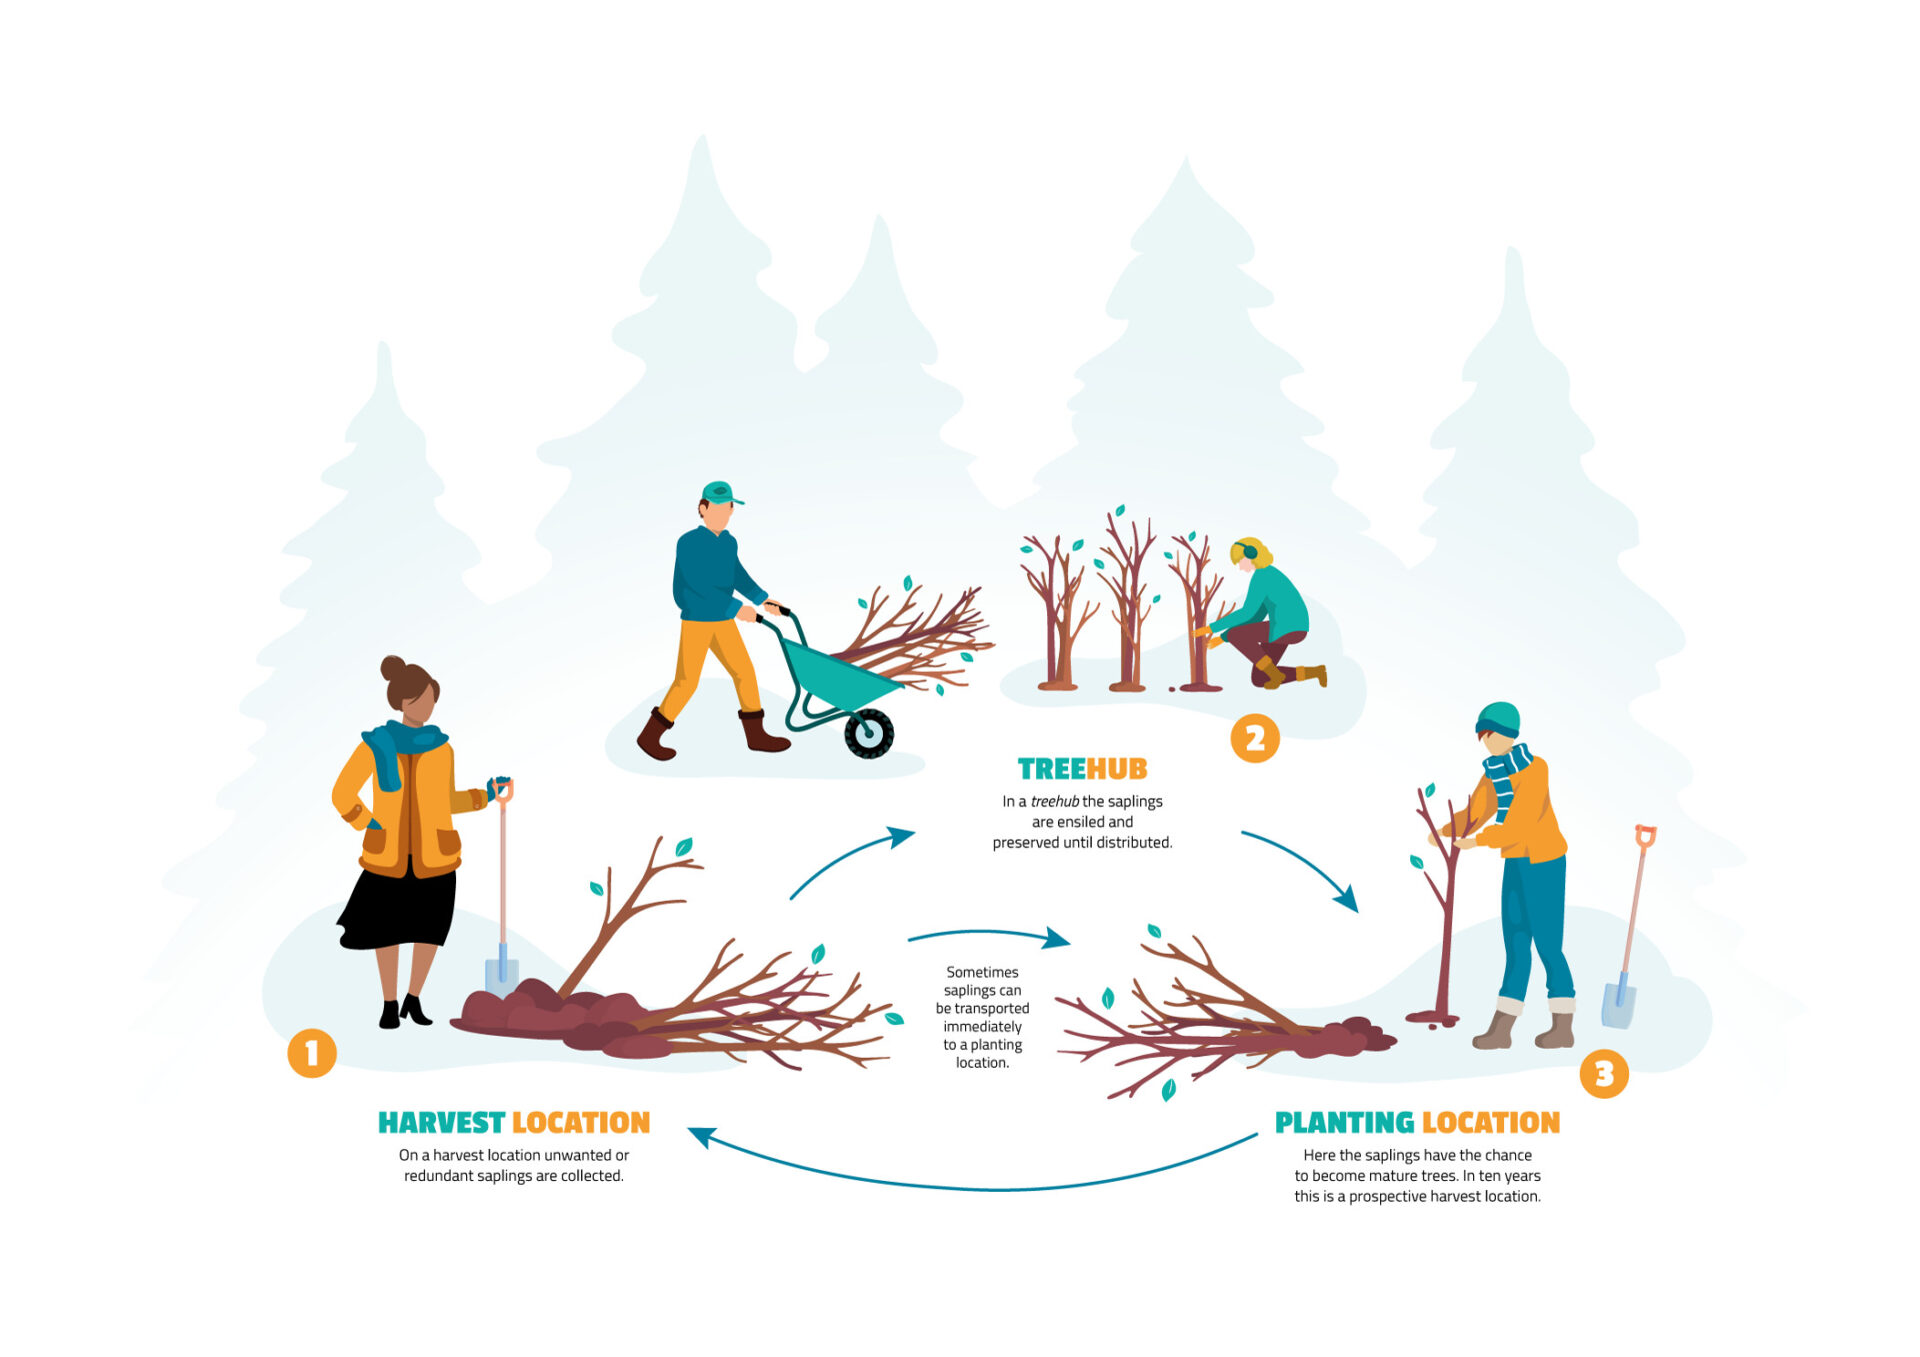
More Trees Now rescues excess saplings for a second chance at life. Disadvantaged seedlings are trees that have sprouted in places where they cannot thrive, such as areas where they are at risk of being mowed. On harvest days, these trees and shrubs are carefully uprooted and saved. You can pick up the saplings directly or you can register for one of the big distribution days.
The More Trees Now season runs from November 1st to March 1st, with an extension to March 15th if all the trees have not been distributed.
Planting is the third and final step of the More Trees Now method. We appreciate your contribution to the greening of the Earth! Every tree that grows is good for the climate and biodiversity. This guide will walk you through all the necessary steps.
In a Tree Hub, saplings are stored and preserved until distribution.
Here, the saplings have the opportunity to grow into mature trees. In ten years, this could potentially be a harvest location.
Always choose variety! Monotonous planting can be bad for biodiversity and leaves your planting vulnerable to diseases. A diverse range of plant species attracts a wide array of creatures that maintain a natural balance.
Native species are often better for biodiversity because they are part of our ecosystem. Spreading them widely is therefore advantageous! Non-native species can also contribute to our ecosystem but can become invasive. It’s important that these trees and plants are planted in a safe location. Only choose non-native species if you plan to manage your planting intensively, such as in a backyard garden or food forest.
Invasive exotics are foreign plants that have increased without a natural predator, thereby dominating other species. The natural predator is absent because the plant wasn’t brought from the original ecosystem. Invasive plants are harmful. We absolutely do not want them to spread further. Therefore, we remove them from the ground during harvesting and do not replant them.
While you typically face fewer legal restrictions on your property, verifying applicable laws and regulations is always beneficial. For example, for fire blight, to curb this tree disease, the government has established buffer zones. This means you cannot plant a hawthorn hedge within 500 metres of a fruit farm and not at all in the buffer zones. Fire blight kills fruit trees and can spread through, for example, hawthorn saplings. A hawthorn hedge next to a fruit farm can be a highway for the disease. Besides buffer zones, it is good to always adhere to this general rule: every disease ‘snaps’ at diverse plantings! So, the more varied your plantings, the less likely diseases are.
Learn about regional plants. Many regional organisations provide advice on planting species that are common in your province.
Plant only in a place where you have permission to plant. Do not sell the plants to third parties; More Trees Now distributes trees for free without a profit motive.
Many of our trees and shrubs are perfectly suited for an agroforestry project, which is a blend of forest and food production. For example, our trees are used to plant forage hedges, create windbreaks for food forests and meadows, improve soil conditions, and much more. Join your local Agroforestry project!
The Ecological Site Classification (ESC) is a web-based decision support system designed to help forest managers and planners select tree species that are ecologically suited to particular sites. This approach encourages the selection of suitable species for a site rather than attempting to modify the site to accommodate a particular species.
The journey begins: you’ve selected your tree species. The next step is to identify which trees are in excess in nature. Some flexibility in this process is recommended. The tree you have set your sights on may not always be available. However, trees that contribute positively to the climate and biodiversity are always present!
Sign up for trees in the Tree Planner. You specify how many trees and shrubs you want to plant. Additionally, you provide information about the soil type and outline your plans. This enables harvesting groups and hubs to assist you in finding the suitable tree or shrub.
You can use the Tree Planner via the website treeplanner.moretreesnow.eco.
Congratulations on creating your profile in the Tree Planner! From now on, you will receive notifications every Wednesday evening at 6pm CET about upcoming events in your area. By signing up as a collector at harvest and/or distribution events, you can select a time slot and collect trees.
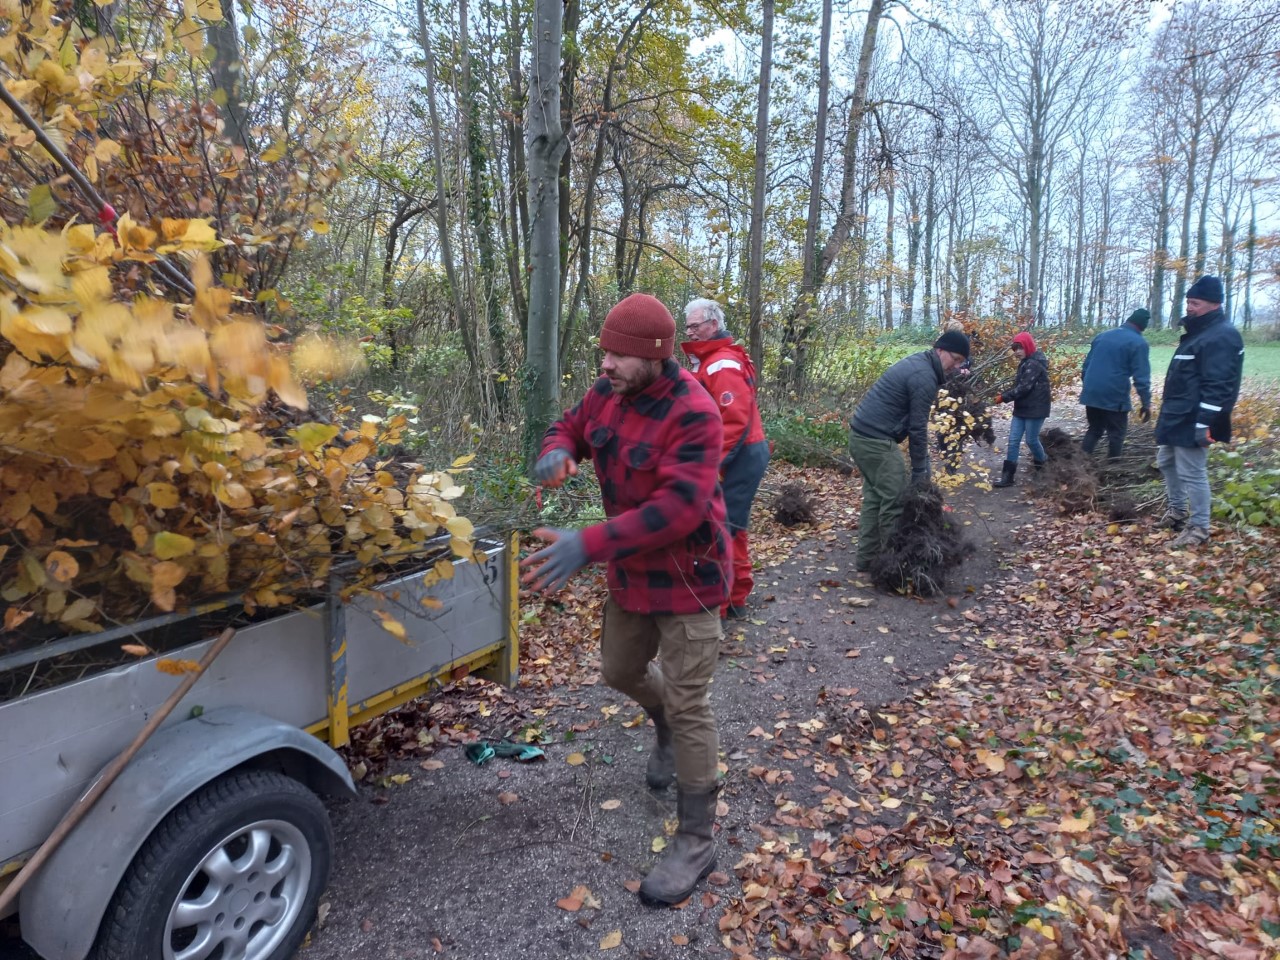
Seedlings are collected on harvest days. Ideally, you should collect the saplings and shrubs immediately. This allows you to replant them almost immediately, enabling them to regrow. If you have the opportunity to attend a harvest day, you can also meet local volunteers. Spend a day harvesting with them or assist them in transporting the (remaining) harvest to a hub. You could even take some extra for your neighbours. This way, volunteers are more likely to remember you the next time they encounter the species you’re interested in at a different location.
On giveaway days, saplings are distributed from a Tree Hub: the collection point for all harvests not immediately collected within a certain region. Distribution days are often busy for a Tree Hub. At a Tree Hub, the supply is usually more extensive, but that often means more competition. A Tree Hub can never make any promises, but it does set the rules of play for each distribution day! When you sign up for a distribution day, you select a time slot and specify how many trees or shrubs you wish to take. Each distribution day operates differently. At some locations, you can choose your own trees and shrubs, while at others, you will receive a pre-assembled package.The seedlings you will collect are typically between 50 and 150 centimetres. Slips are around 2 meters long, and cuttings are approximately 50 centimetres. All are often no thicker than 2 centimetres. This makes collection feasible by bike! The boot of a car is also a suitable option. Are you planning to collect a large number of trees? If yes, a trailer might come in handy. The trees have dry roots (no root ball), so it’s important to cover them well and water your tree upon arrival at home.
Once you have signed up to collect trees at a specific location, you will receive a confirmation email or an in-app notification. This will include a QR code that serves as your ticket for your chosen time slot. Upon arrival, a volunteer will scan your QR code and note the types of trees you’re collecting. Please inform the volunteer of any preferences you may have, based on step 1. It’s important to never collect trees on your own unless explicitly instructed to do so. Always follow the volunteers’ instructions for a safe pickup day!
Consider in advance the number of trees you plan to collect. Bring a deep plastic bag, a rubber band or rope, and a damp towel. Place the towel at the bottom of the plastic bag to keep the seedling roots moist. If the seedlings are somewhat taller, it may be beneficial to place the bag in a pannier and tie the tops of the seedlings together into a bundle.
Prepare your car by laying the back seat flat and covering it with a tarp. This will help keep your car clean. Bring along some old towels and a bottle of water. Dampen the towels and place them over the roots. This will improve the seedlings’ chances of survival.
Bring tarp, rope, elastic bands, old towels, bottles of water, and weights. Place the trees and shrubs on the trailer with the roots facing the car. Place the old towels on top and then pour the water from the bottles onto the towel to keep the roots moist. Finally, cover all the trees with tarp, secure it with the rope and elastic bands, and tie it down tightly to prevent anything from blowing off.
If you are not going to plant right away, it’s advisable to place the trees in water or pit them as soon as you get home. You can put them in water, as long as it’s not freezing, for up to a week before their roots begin to mould. Slips and cuttings can be kept in water indefinitely. Heeling in involves digging a hole, placing the forest trees in it, and covering all roots with soil. This prevents the roots from drying out before planting.
On the day of distribution, the volunteer will provide information about the trees and shrubs you will be taking home. We recommend writing down this information. Not quite sure yet? Our bud chart offers a summary of all the species most frequently harvested during the winter season!
Get the latest events on your mobile with the More Trees Now App.
When planting, it’s crucial to position tall trees in the centre of your hedge or planting area, with sun-loving, flowering, and berry-bearing shrubs on the periphery. This arrangement ensures each tree receives the sunlight it requires.
After 3-4 years, consider pruning back some of the trees, particularly the fast growers that contribute less to insect populations. This allows light to reach other trees and shrubs. Alternatively, you may opt to transplant a portion of the trees to cultivate more natural spaces elsewhere.
While allowing natural selection to take its course is an option, there may be better options for biodiversity. Proactive management of the area can be good for insects and birds.
For both trees and shrubs, the planting hole should be sufficiently wide and deep, typically about one-third deeper and wider than the roots. Cuttings must have at least two nodes in the ground to make new roots. A node is where the cutting sprouts, creating roots and branches. For a 50-centimetre cutting, this often means inserting the cutting about 25 centimetres into the ground from the bottom. Slips, such as Willows and Poplars, should be planted at least 50 centimetres deep to reach the groundwater.
The density of holes dug can vary depending on the tree species and type of landscape element. We recommend planting seedlings reasonably close together when creating hedges and hedgerows. This promotes greater biodiversity and CO₂ uptake per square meter, and the canopy closes faster. Limiting light exposure helps deter weeds such as thistles and sorrel. You can use the tree finder to determine how much space a tree needs to fully grow. If a tree requires a two-by-two-meter space, then the next hole should be dug 2 meters away.
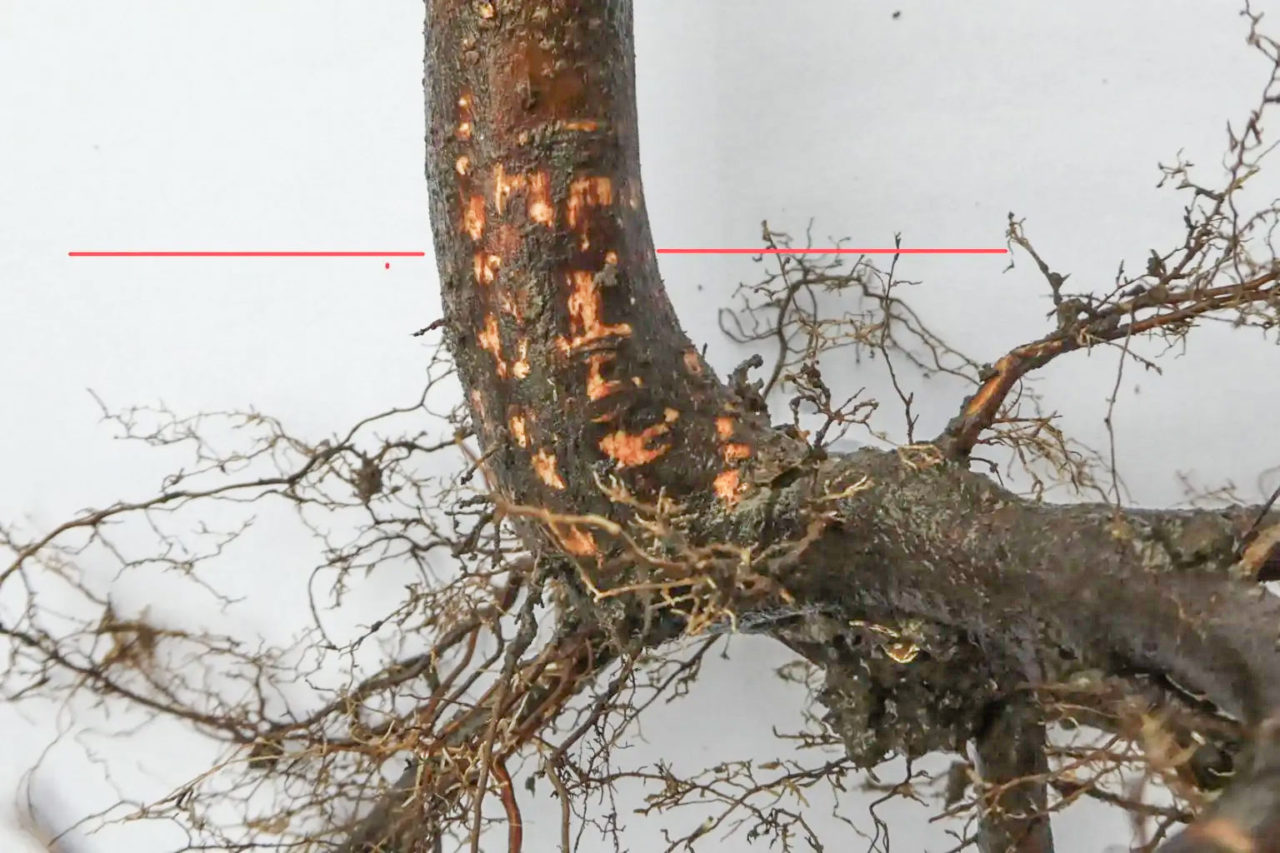
To plant the tree, position it in the hole. While doing so, keep the tree slightly higher than the final planting depth rather than placing it at the very bottom of the hole. Ultimately, the root neck (see photo below) should align with the boundary between soil and air. On certain trees, you may notice ridges on the root neck, which makes it easier. When you put the tree in, keep it stable. It’s crucial that the roots do not twist during planting, as this could lead to the tree becoming unstable or potentially strangling itself.
Fill the hole with moist, loose soil. Make sure the soil that touches the hair roots (the roots thinner than 1 millimetre) is well-crumbled. Gently shake the tree up and down to allow the soil to settle between the hair roots. Be careful not to press large clods between the roots, as this could suffocate them.
Struggling with loose soil? This might be the case if you’re dealing with clay soil and the soil in the pit is difficult to loosen. In such instances, consider tillage, provided you have the necessary materials. A power harrow could be used with a thin layer of turf or vegetation, and a disc harrow might be more suitable with a thick layer of turf or vegetation. These methods can help to loosen the soil slightly. Staking is another option. These are all ways to remove the grass and loosen the soil.
Place about 10 inches of soil above the hair roots and press it down with your foot to ensure the roots are well-covered with soil moisture.
Get the latest events on your mobile with the More Trees Now App.
It is very important that young plants get enough water, particularly during the first two years. Watch for signs of dehydration, such as leaves beginning to flatten and droop. If you notice these signs, water the plants immediately. You can assist the plants by pruning tall grass in a circle around the trunk, reducing competition for water and nutrients between the trees, shrubs, and grass. You can put wood chips around the tree bed (the area surrounding your tree’s trunk) to retain water more effectively.
Give your trees time! If they don’t sprout much in the first year, that doesn’t mean they won’t in the following year. The roots of the seedlings, particularly if damaged, need time to develop to handle as much water as the leaves can evaporate.
Pruning back the side branches can help roots develop adequately during prolonged drought. Note that each species has a different pruning period.
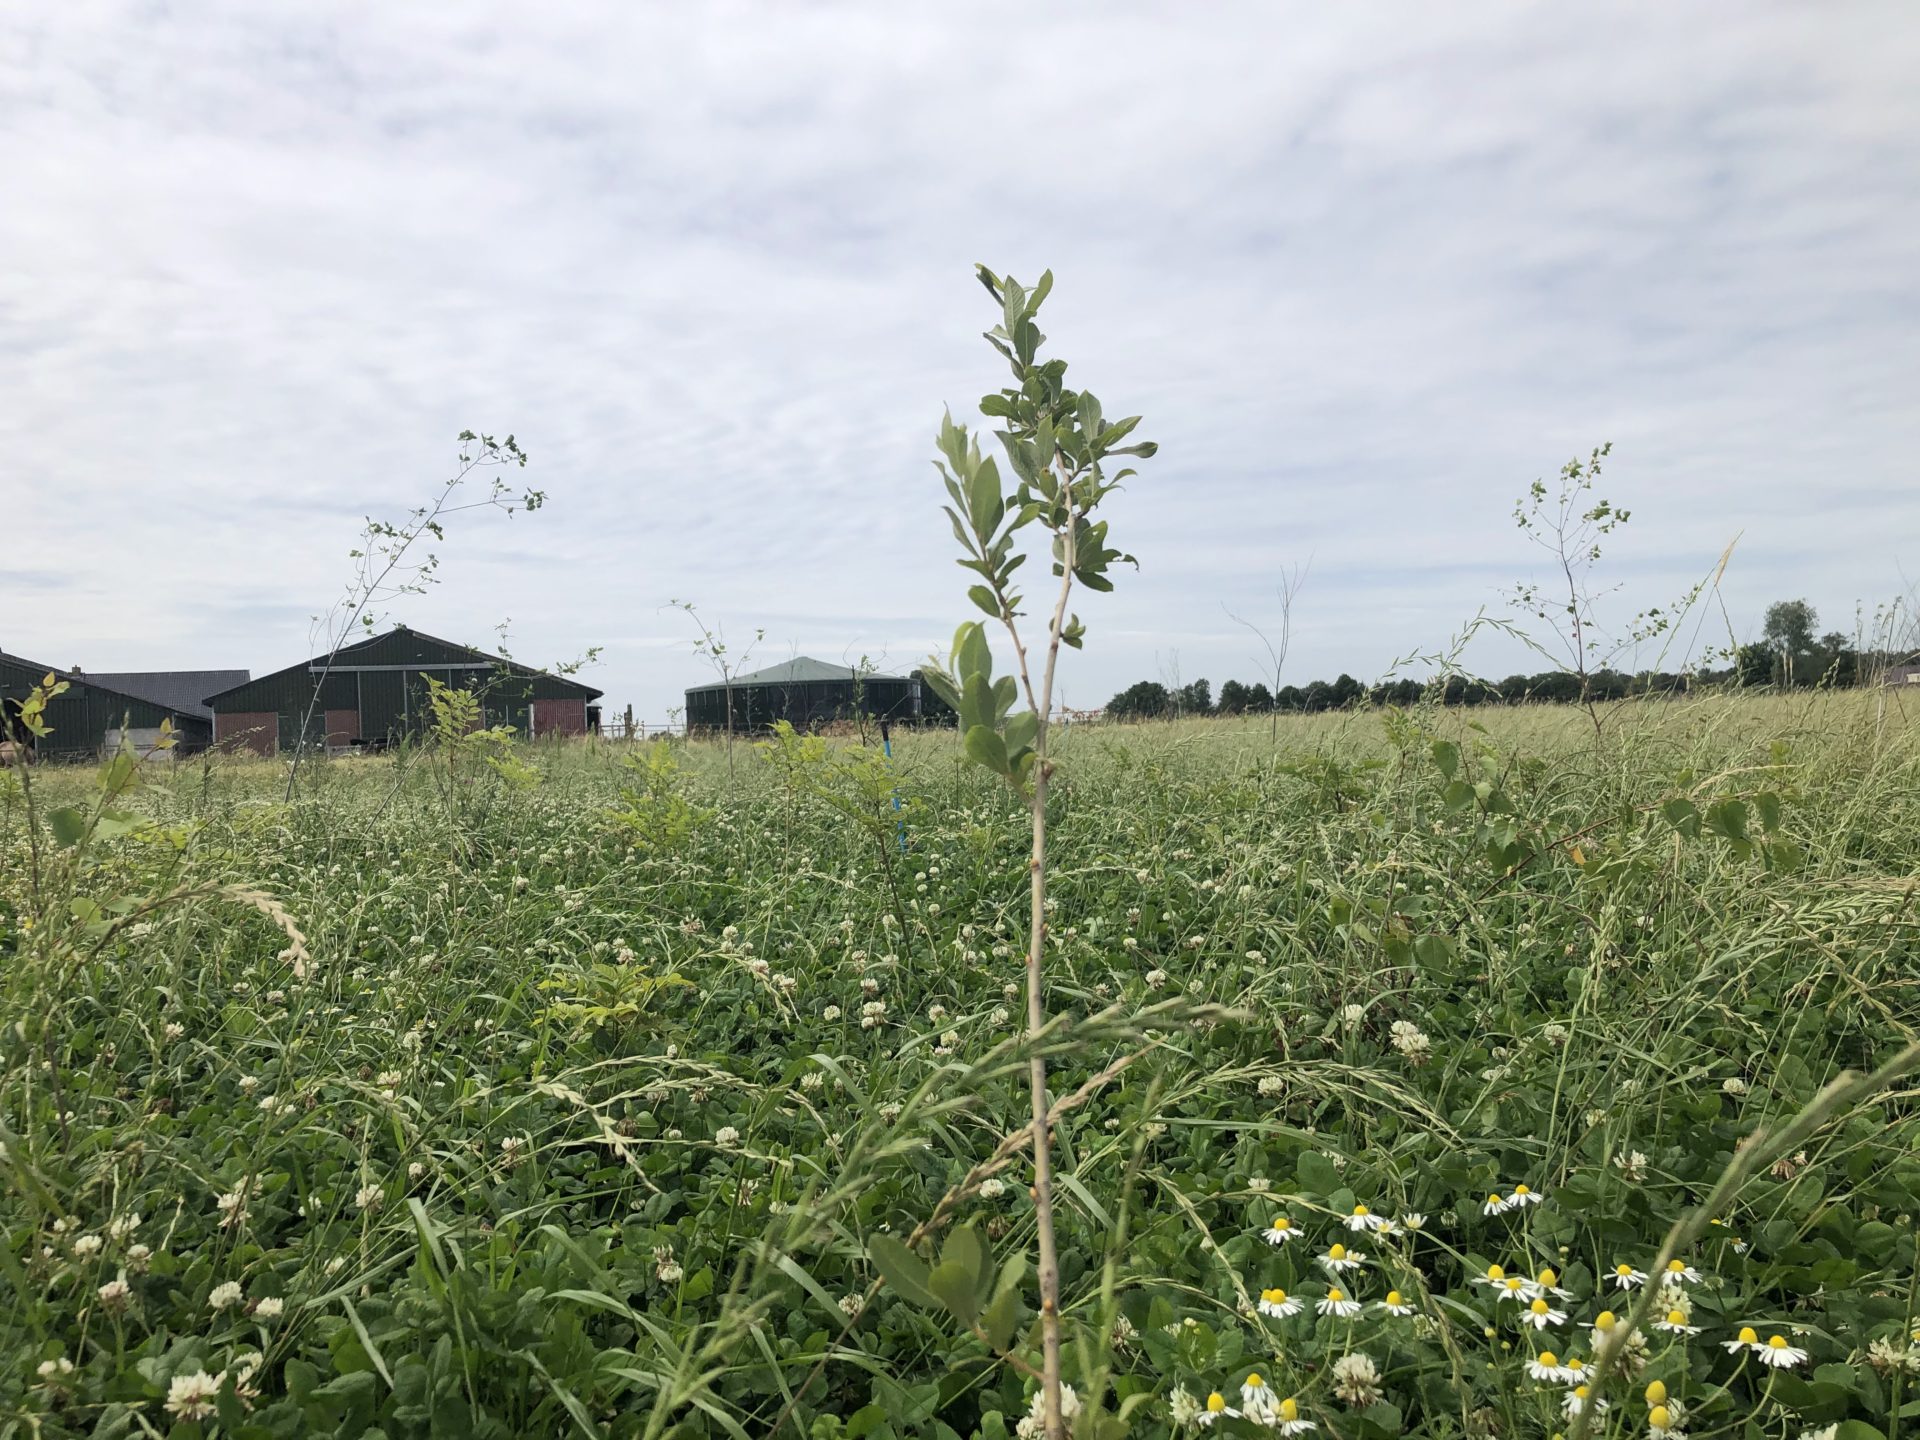
Boost biodiversity by planting native flowers and herbs under trees and shrubs! For larger planting sites, pre-sow with a native flower and herb mixture. We plant so close together that you won’t be able to reach it afterwards with machinery, and it is difficult with a rake. Avoid sowing before mid-November, as there’s a risk that the seeds will germinate and then be damaged during planting. This sea of flowers not only prevents unwanted growth of plants such as thistles and sorrel, but also enhances the trees’ survival chances. You’ll be making a significant contribution to biodiversity as early as spring, and it will immediately create a beautiful sight.
If you have a limited number of trees, it could be beneficial to provide the tree with some compost or mulch.
Good luck with the trees. Together we are making the Earth greener faster!
We will send you a message in the summer, asking you to let us know in our system how well the trees have taken root. This will help us improve the planting method. Thanks in advance!